Clipboard2Image is a macOS utility to automatically save images to disk. It tracks new content on the clipboard, and saves it as an image to disk in SVG, JPG, PNG, or PDF formats. Even rich text on the clipboard can be saved as an image file, for use as an image in other apps.
Use Cases for Clipboard2Image
You may find the Clipboard2Image app useful in a few scenarios:
Rapid Export: If you’re creating graphics in an app like Microsoft PowerPoint, Keynote, Sketch, Affinity Designer, OmniGraffle, Curio or others, and you want a quick way to export only the selected part of the graphic as SVG or vector PDF on disk.
Image Format Autoconversion: While you can convert any image format to another using Preview.app through the File > Save As... or File > Export... op- tions, you can get faster results with the Clipboard2Image app. For example, if you need to take several screenshots in PDF format, you can use Clipboard- 2Image to set up your workflow accordingly.
Image attachments: Some apps on macOS such as the popular Wunderlist do not allow users to paste image content from the clipboard as an attachment. However, such apps may instead allow drag-and-drop of images from disk. The Clipboard2Image app offers a solution by converting content on the clipboard to an image on disk, so it can be drag-and-dropped into such apps.
Writing workflow: Suppose you want to insert images while writing in one of the popular authoring apps like Ulysses or Bear - to do so you can configure Clipboard2Image to prepare a PNG or JPEG graphic accordingly, with a border applied and the images resized correctly for output. With the advanced feature of automatically overwriting the clipboard with new images, after you copy the graphics from the source app, the Clipboard2Image app will format and make the new image ready to paste in your writing app. In this manner, Clipboard2Image can work in the background to speed up your workflow.
Getting Started
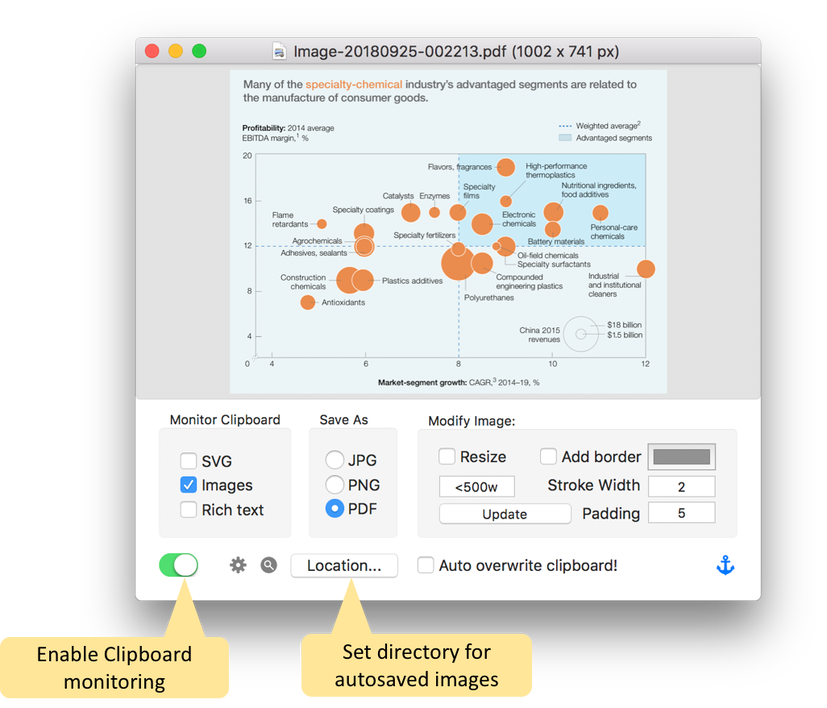
To configure the app, three settings are important: 1. Enable clipboard monitoring: The switch at bottom left of the user interface controls clipboard monitoring - turn it on to enable clipboard monitoring. Alternatively, use the File menu > Enable Clipboard Monitoring command, or the keyboard shortcut ⌘M. When monitoring is enabled, the app will save an image every time new content is placed on the clipboard.
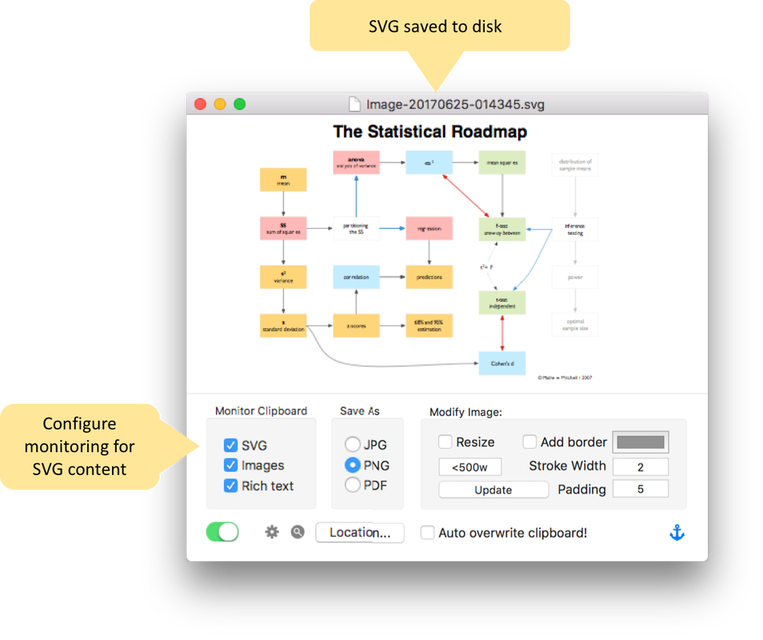
2. Select what to monitor on the clipboard: The app can monitor SVG graphics, and images, and text copied to the clipboard.
SVG graphics are plain text strings that represent vector images and are copied to the clipboard by apps such as Affinity Designer, OmniGraffle 7, and Boxy SVG.
Images includes all raster and vector image formats understood by macOS. Commonly, you can copy images from documents and web pages, from Preview.app using the rectangular selection tool, and the screenshots capability provided by macOS.
Text: includes plain text, rich text, and HTML content copied to the clipboard. Converting text to an image may be useful for sharing on social media, to insert rich text content into markdown text editors like Ulysses and Bear, or other situations where preserving the formatting of rich text is important.
3. Select image format to save on disk: The app saves to .SVG when it detects SVG vector graphics on the clipboard (and SVG monitoring is enabled). For images and text, you can select between JPG, PNG, and PDF save formats.
Using Clipboard2Image
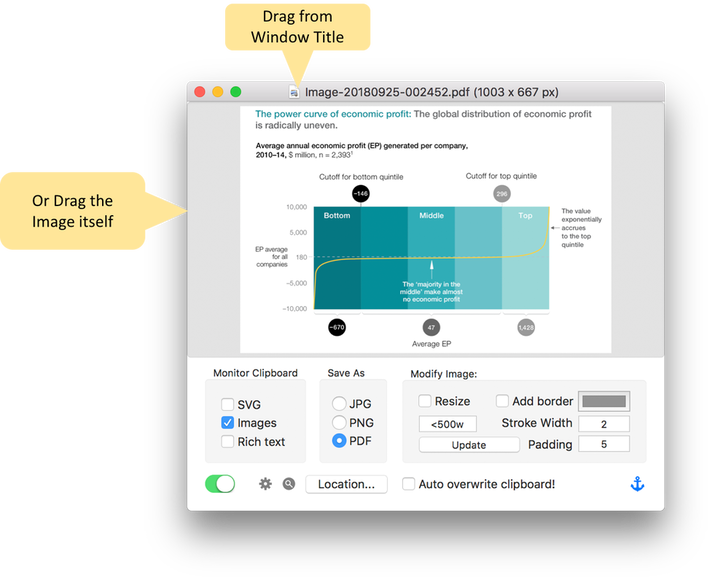
By default, images are saved in the macOS specified sandboxed directory for the Clipboard2Image app. You can specify your own directory using the “Location…” button. The 🔍icon to the left of the “Location…” button will reveal the current save location (directory) in the Finder. Images are named using a date timestamp which ensures the images are sorted by date, which should help in locating a prior image easily. Further, you can directly drag out the last generated image from the Clipboard2Image app window, either from the window’s title bar (as in other macOS apps) or by dragging from the image itself.
The SVG Assistant Workflow
SVG is an industry standard image format for vector graphics, and modern graphics apps are able to import and export in the SVG format.
On macOS, three drawing apps provide the ability to place SVG content directly on the clipboard when copying objects from the app. The Clipboard2Image app can detect and save this SVG content to disk in the .svg format, so it can be used in apps that support importing SVG files but do not allow pasting SVG content from the clipboard. In this role, Clipboard2Image app serves to bridge the gap between apps that author SVG content and apps that consume it.
SVG content on the clipboard is handled on a priority basis in the sense that if the Clipboard2Image app detects SVG (and monitoring of SVG is enabled), then it will choose to save .SVG to disk, and ignore any other image format on the clipboard until the contents of the clipboard change again.
Advanced Configuration
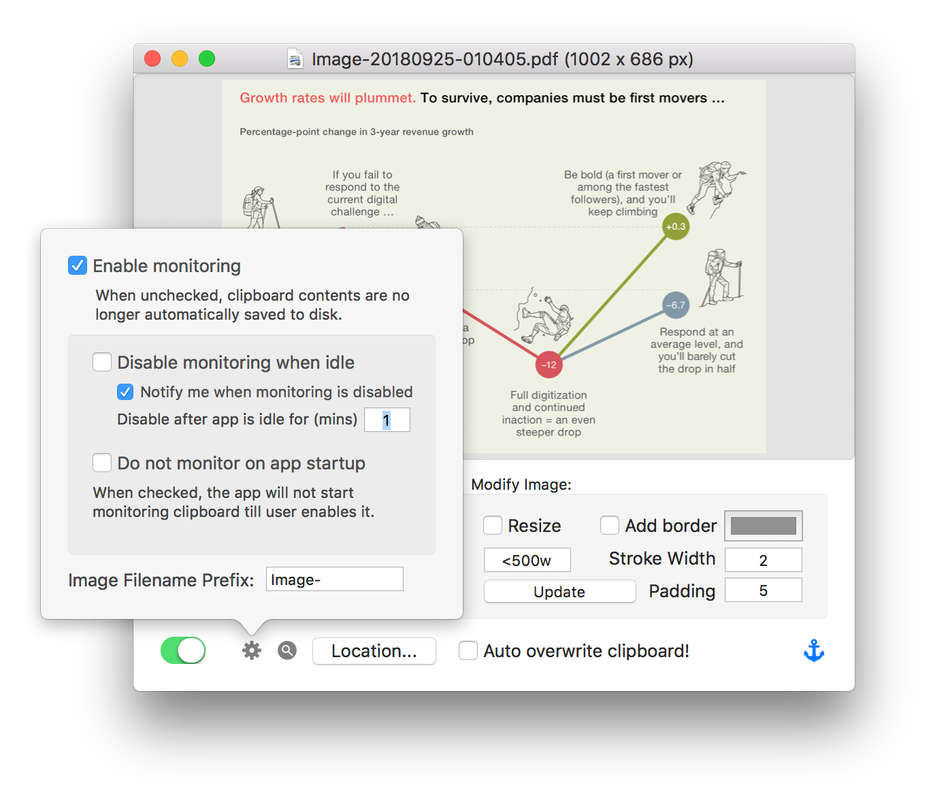
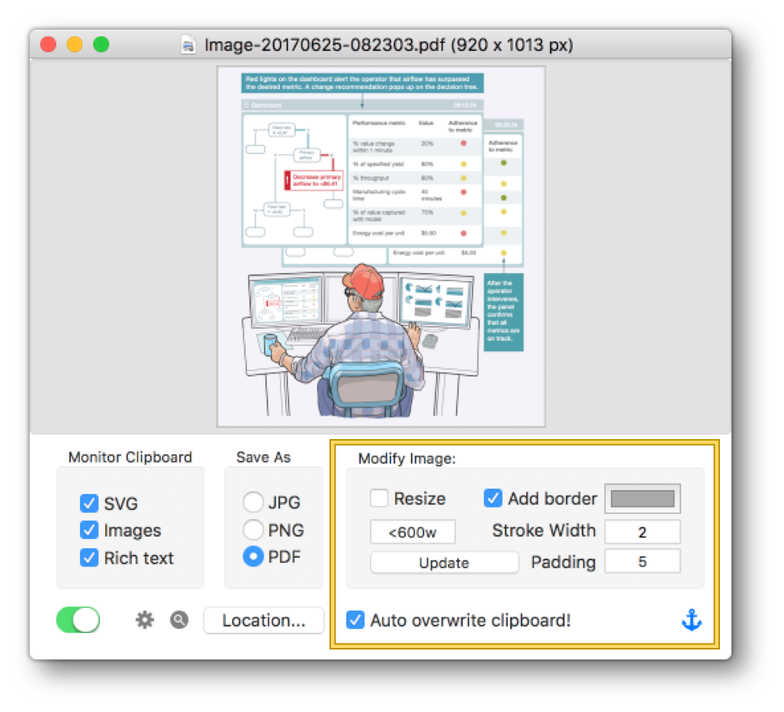
The ⚙ icon on the bottom left of the user interface reveals additional options for configuring the Clipboard2Image app. For example, you can choose to disable monitoring automatically when the app has not been brought to the front for a few minutes, to ensure that images are not unnecessarily saved to disk when you’re no longer actively using the Clipboard2Image app.
You can also change the prefix used for filenames given to images saved to disk. Usually, the app will remember whether clipboard monitoring was enabled or not when it was quit, and will relaunch in the same state. However, you can choose to have clipboard monitoring always disabled at launch.
Advanced Features
Advanced features in the Clipboard2Image app include:
The option to resize the image on the clipboard, and whether to add a border by specifying either a padding width or a border width or both. The resize checkbox controls whether the image will be resized. You can specify a width or height resizing formula such as “800w” for resizing exactly to 800 pixels width, or “<800w” for only resizing large images down to 800 pixels wide but will not scale up any images that are already smaller than 800 pixels wide.
The option to automatically overwrite the contents of the clipboard with the newly generated image, so it can be pasted immediately into another app. This allows for the Clipboard2Image app to work silently in the background while assisting in your workflow.
The option to ensure the app window stays on top of other windows so it is easy to drag-and-drop the newly generated image into any destination app. Click the anchor icon on the bottom right of the user interface to toggle this feature on and off. When the anchor icon is blue, this option is enabled.