PDFSpeech is a macOS application published by onekerato.com, available for Macs running OS X 10.7 Lion and later. At its core, PDFSpeech has the ability to read out the text content in a PDF using text-to-speech technology built into macOS. It’s purpose is to help you read more.
How can PDFSpeech help you read more? Simply put, it reduces the effort involved in reading. Just like watching videos is “easy”, reading a book using text-to-speech technology (TTS) is “easy” because you can sit back and “watch” the book unfold. Of course, you still need to pay attention, but what TTS-powered reading gives you for free is momentum. And momentum is the secret to achieving your goals.
To make the most of PDFSpeech, load your reading list into the app, and start TTS by double-clicking on a word. Momentum will do the rest.
How to Use PDFSpeech
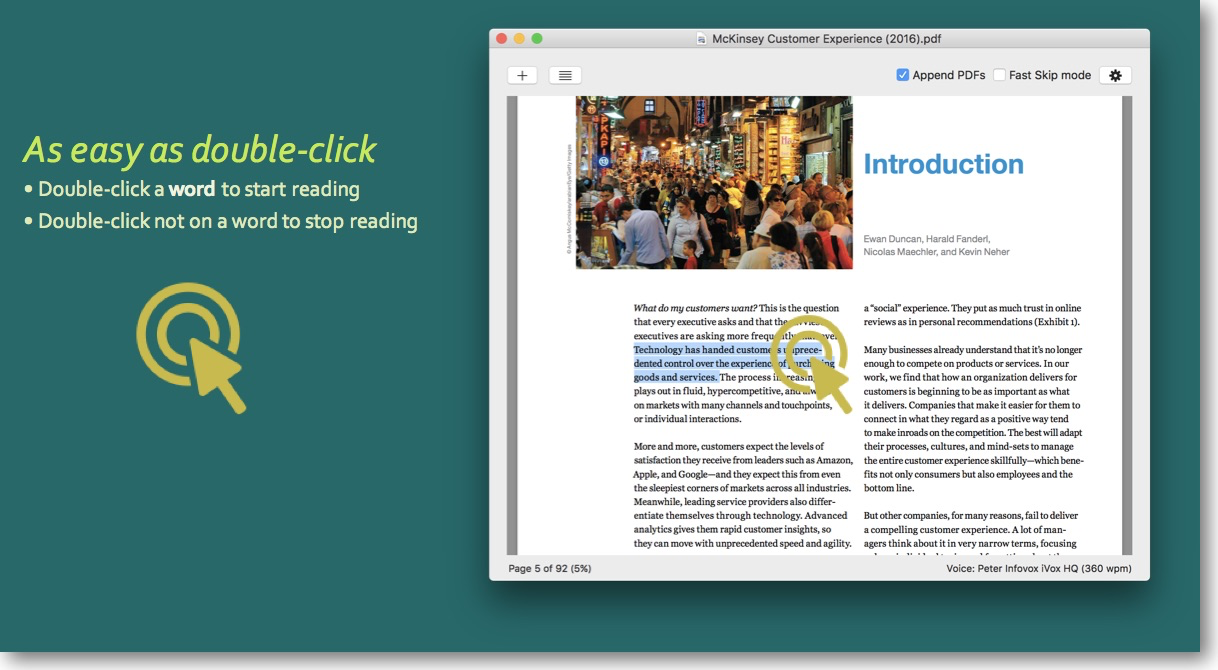
To get started with PDFSpeech, open a PDF and simply double-click on any word in the PDF.
PDFSpeech will begin reading the sentences from that point forward through the document.
To stop, simply double-click anywhere in the margins.
Set Your Choice for the Text-to-Speech Voice
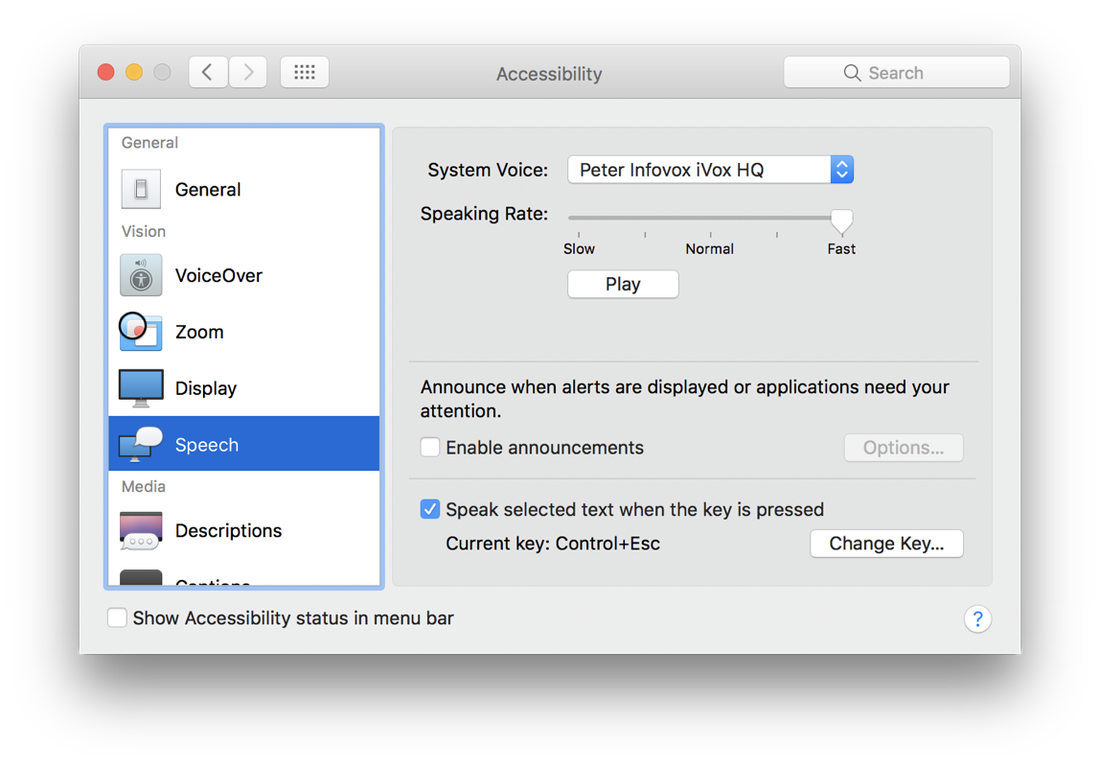
PDFSpeech uses the text-to-speech settings configured in macOS System Preferences. On macOS Sierra, the speech settings are located in the Accessibility pane. You can specify the system voice and the speaking rate. If you’re wearing a headset, you will be able to listen and follow along even when the speaking rate slider is close to or at the maximum, which corresponds to around 340-360 WPM (words per minute.) High TTS speeds also help you maintain focus for longer (win-win). At 350 WPM, you can read one long chapter of a business or technical book (say 10,000 words) in 30 mins.
macOS offers several high-quality voices (for free!) that can be used for TTS in any app on your Mac. Two system voices with good clarity for reading technical content, in my opinion, are Daniel (UK) and Samantha(US). You can also purchase pro-quality Acapela voices for around $15 each from AssistiveWare Infovox iVox, licensed for use on your Mac.
Bring Your Reading List into PDFSpeech
PDFSpeech only works with PDFs, and that may seem like a huge limitation for users who want to bring their diverse reading list into this app. However, there are a few reasons why PDFSpeech only works with PDFs:
PDFs are favored by publishers for long-form digital content such as books & magazines because PDFs can faithfully preserve text & images in carefully crafted page layouts, are easy to annotate (for study & reference), and is a mature format that works consistently across all platforms.
Every macOS app that can print can also make a PDF, thus your reading list can be easily converted to the PDF format.
macOS makes it convenient for developers to work with PDFs, such as to package multiple PDF documents into a single PDF, and add a table of contents to help with navigating a long PDF.
That said, you will have to bring your reading list into PDFSpeech, by turning it into PDFs where required. Here are four ways to do so in PDFSpeech:
Open a PDF from disk: Use File > Open… or click the “+” button on the top left of the window. You can also drag PDFs to the PDFSpeech icon in the dock. This is the recommended approach for importing professionally-produced PDFs, which usually contain a table of contents that can be used for navigation in PDFSpeech.
Print to PDFSpeech: Add PDFSpeech as a target in the Print… dialog, and you can print content from any macOS app such as web content in Safari and Google Chrome, reports in Microsoft Word, or sections of an EPUB from an app like Murasaki. Visit onekerato.com for a handy tip on using custom paper sizes to print a pretty PDF.
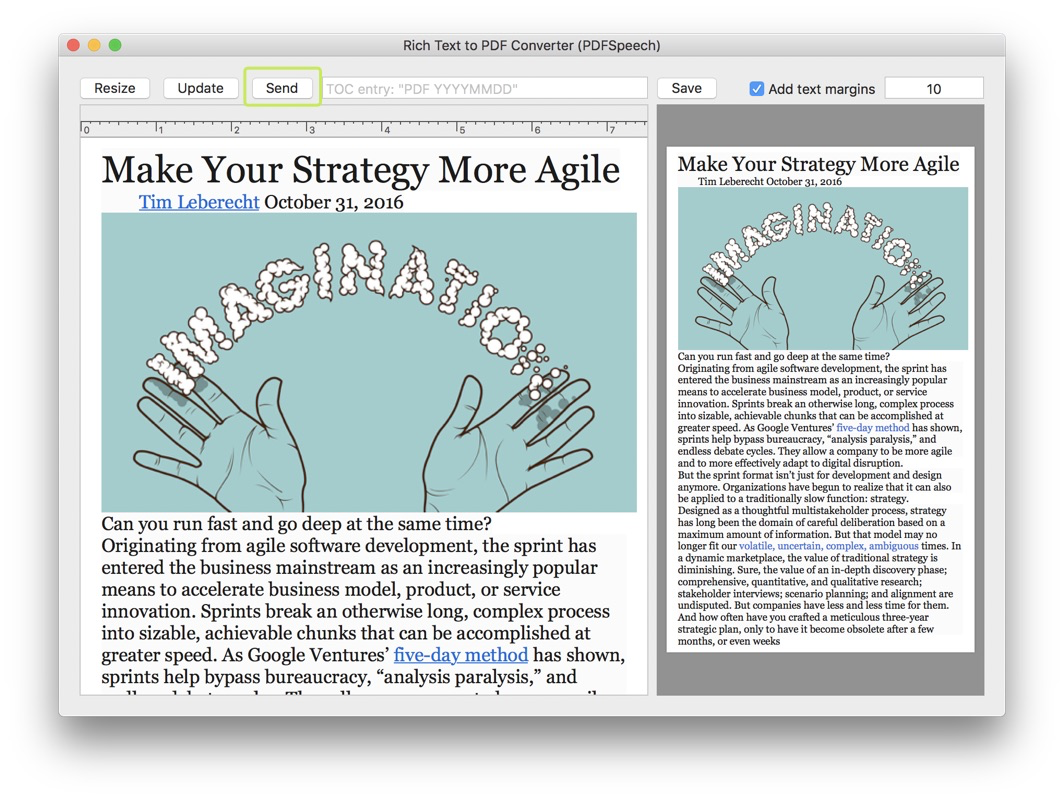
PDF from Clipboard Contents: You can copy text & images in any app, and create a PDF out of it using File > Insert Clipboard Contents. This menu command comes in two flavors: an interactive window where you can fine-tune the copied text & resize images and the PDF, and a “fast” automatic mode. Note that PDFSpeech always creates a “slim fit” single-page PDF from clipboard contents, which frankly looks quite elegant. If you want to resize the PDF, simply resize the window to change the width of the single page (the height automatically adjusts to fit the content.)
PDF pages from Preview: Often, you may have already opened a PDF in Preview, the reader app bundled with macOS. You can select one or multiple pages from the thumbnails in the sidebar, copy to clipboard, switch to PDFSpeech and use the menu command File > Insert PDF pages on Clipboard. This is a quick way to tap into PDFSpeech to skim a few pages (or a chapter) with TTS-powered reading. Alternatively, with an AppleScript automation shortcut, you can send the PDF open in Preview directly into PDFSpeech.
Get Organized with a PDF Pack
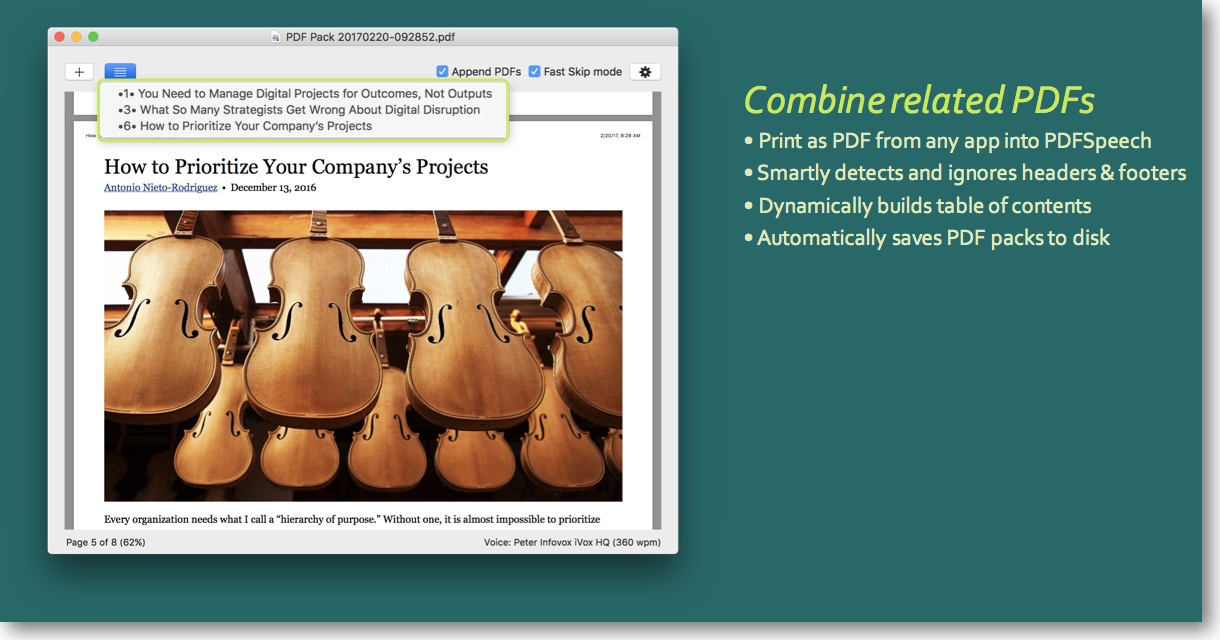
While PDFSpeech works great for importing PDFs, it really shines in creating PDF Packs, i.e. a collection of PDFs. Conveniently located on the toolbar is an option to “Append PDFs”. When this option is checked, any new PDF opened in PDFSpeech will be appended to the existing PDF, to create a PDF Pack. Any existing table of contents in the PDFs will be preserved, and a top-level table of contents will be added with links to the first page of each PDF in the pack. Moreover, these PDF Packs are automatically saved to disk. To open the save location, select File > Show Autosaved PDF Packs Directory. You can also use File > Save As… to save a copy of the current PDF Pack elsewhere.
The ability to create PDF Packs is also present in PDFCombo, a free companion app for macOS, also developed by onekerato.com.
Building a PDF Pack is a great way to collect all your reading content in one pack: print from the web, extract pages from existing PDFs, or import text & images from the clipboard. Then you can use PDFSpeech to read through the entire PDF Pack.
Navigation within PDFs
In PDFSpeech, the primary means of navigating through the PDF is scrolling through it. When TTS is active, the pages will be scrolled automatically such that the sentence currently spoken by TTS is highlighted and kept visible on screen.
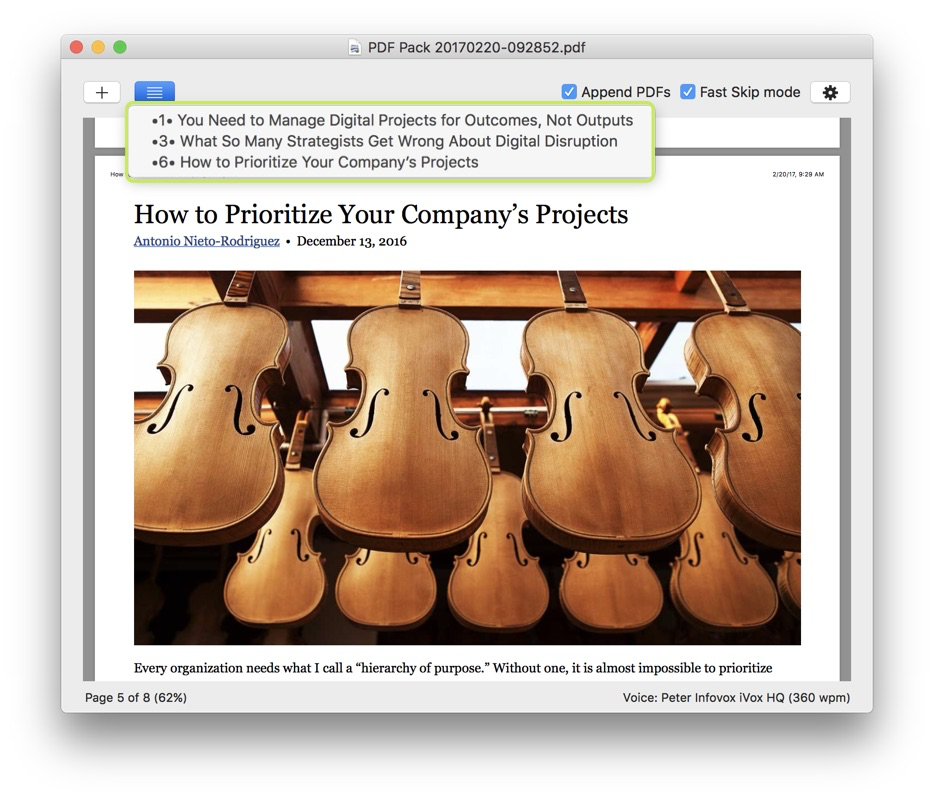
In addition, if the PDF has a table of contents, it is shown when clicking on the outlines button, and you can then navigate using the outline. For PDF Packs, as PDFs are appended to the pack, the menu updates to show a top-level outline entry for each PDF in the pack. In the screenshot below, three web articles were printed to create the PDF Pack, and the outline allows switching to a specific PDF in the pack. Note also the numbered prefix for each outline entry such as “•3•”, which refers to the page number for that PDF in the pack. This allows the reader to quickly estimate the size of each PDF, for example, that the second PDF in this pack is 3 pages long.
A table of contents is especially valuable in long PDFs. If your PDF does not contain a table of contents, or you would like to modify an existing one, you can use PDFOutliner, an OS X app also developed by onekerato.com.
Quick Text-to-Speech
To start text-to-speech, double-click on any word. PDFSpeech will start speaking with the sentence containing that word, and then speak subsequent sentences. At any point, you can double-click another word to start the speech from that point forward, which also allows you to go back and read a part again. To stop text-to-speech, double-click anywhere other than a word. Usually, it’s easiest to double-click in the whitespace of the page margins.
Next, this guide covers the configuration options available in PDFSpeech that make it easier to listen to the PDF document.
Configure PDFSpeech to Read Your Content
The objective behind configuring PDFSpeech is to control what should be read on the page. For example, internally, PDFSpeech tries to detect URLs and not read them out. In web pages printed from Safari’s reader view for example, there is usually a long URL in the footer. PDFSpeech, if it detects the URL, will abbreviate speaking it - thereby overriding the default behavior of the TTS engine which is to spell out the entire URL.
In addition, there are a few choices you can make in PDFSpeech to guide the behavior of the TTS engine, as discussed below.
Skip Headers & Footers
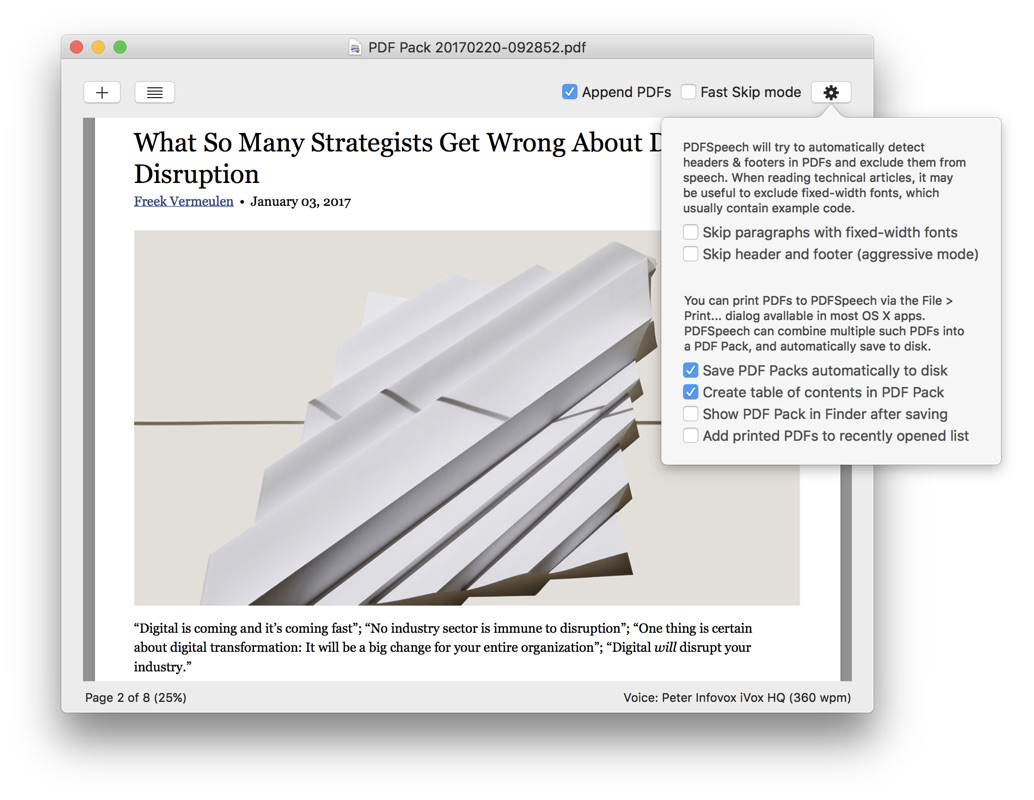
Headers and footers are very common in PDF documents, and it gets tedious to listen to the TTS engine read out every header & footer on every page, often breaking the chain of thought as you follow the content from one page to the next. That’s why PDFSpeech automatically detects headers & footers and does not send that text to the TTS engine. However, the detection may fail on certain PDFs, and in such cases, you can enable the “Skip header and footer (aggressive mode)” option which tries to specifically identify fonts in the document used in headers & footers, and skip any text that uses these fonts. Of course, this algorithm may unfortunately backfire if the font used for headers & footers is identical to that used for body text. You should disable the “aggressive mode” if the TTS engine skips a lot of text that it should not.
Skip Paragraphs of Fixed Width Fonts
In many technical books (especially programming books), fixed-width fonts are used to mark code blocks. It may not make sense to pass such code snippets into the TTS engine, which can at best only attempt to spell out unfamiliar programming words that are not part of its vocabulary. The option to “Skip paragraphs with fixed-width fonts” when checked tells PDFSpeech to find paragraphs which predominantly contain fixed-width fonts and not pass them to the TTS engine. As noted above, you may find it useful to check this option when reading programming or technical books in PDFSpeech.
Fast Skip Mode
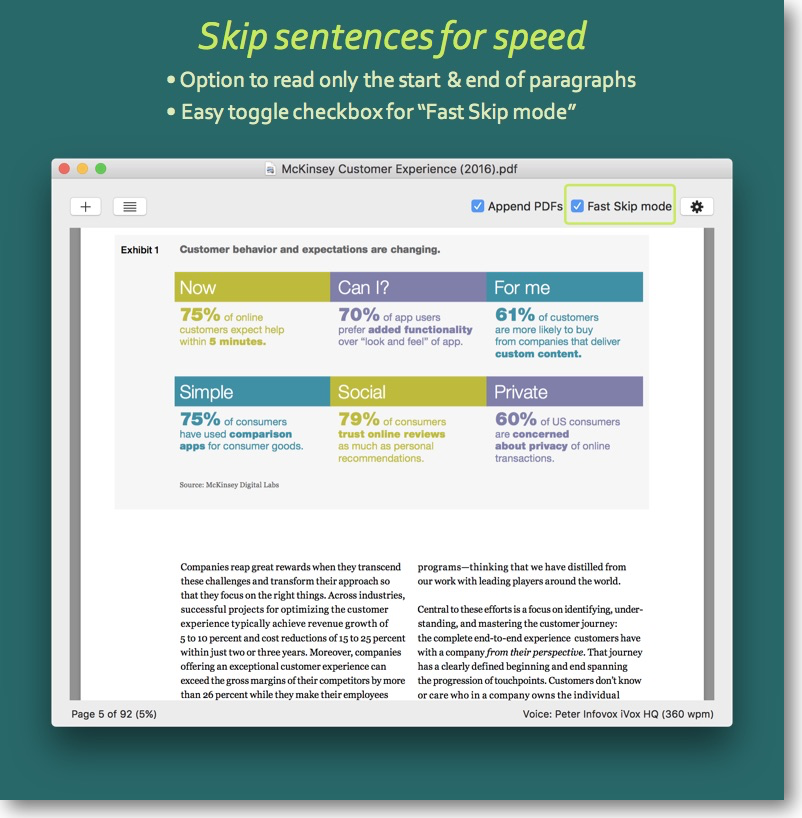
One popular technique for speed reading is to focus on topic sentences and ignore the rest of the paragraph. Usually the topic sentences are at the beginning or end of paragraphs. Hence, PDFSpeech provides the option of “Fast Skip mode” wherein only the first two and last two sentences of paragraphs will be read out. Usually, this is sufficient to get a good overview of the content, especially in books that provide detailed explanations. This option will save you time, and even avoid the frustration that arises with verbose text. Note that paragraphs of four sentences or fewer will be read out in full anyway.
Word Mappings
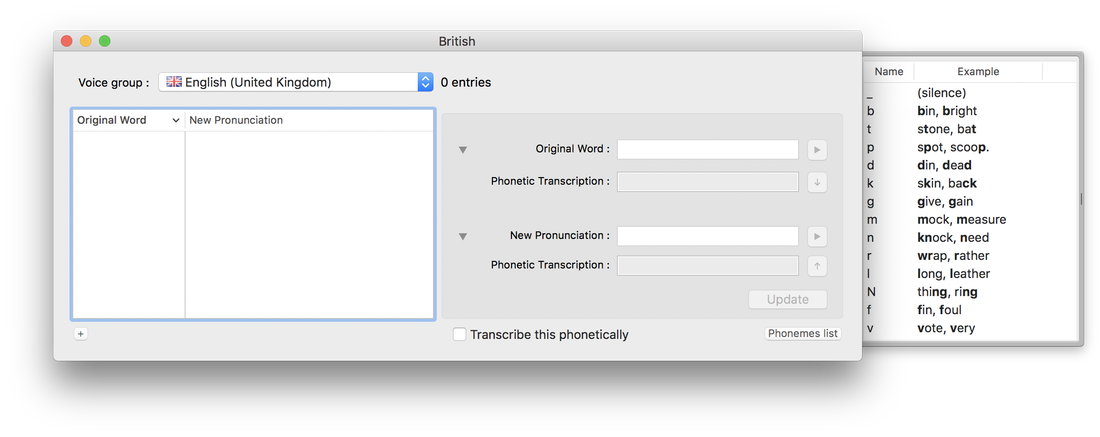
The TTS engine is equipped with a limited vocabulary, and tries its best to correctly pronounce words that it encounters outside of this vocabulary. For example, the unusual word “PDFSpeech” is by default pronounced by the TTS engine as its component characters “P-D-F-S p.e.e.c.h.” Such mispronunciations can quickly get annoying! Therefore, the PDFSpeech application includes a simple yet very helpful word mapping feature, wherein you specify the word it should look for and what to substitute it with. To locate the word mappings file, and edit it, go to File > Show Custom Word Mappings Text File. After you’re made edits (say in TextEdit) and saved it in place, go to File > Reload Custom Word Mappings.
In the text file that ships with PDFSpeech, you will find word mappings for words like macOS, URLs, onekerato.com and PDFSpeech that make it easier to listen to this user guide. You should add words to this Word Mappings text file as required to weed out pronunciation errors, and thus make it easier for yourself to listen to the text-to-speech voice on a sustained basis.
Note that these word mappings only apply to text that is spoken through the PDFSpeech app, because the words are being intercepted and replaced before they reach the TTS engine. The InfoVox iVox Voice Manager third-party app provides similar functionality (via a “pronunciation editor” feature) to customize it’s own suite of TTS voices, where such customizations would apply across all OS X apps that use these voices.
Visit the product website for tips on how to leverage PDFSpeech and other applications to increase your reading throughput.
For support and feedback, kindly use the menu command, Help → Contact Customer Support, or send an email to [email protected], or you can use the contact form on the website.